Introducing the Block

This post is part of a series called 2020: The Year of the Pants. Catch all of the posts via the YOTP tag.
Now that we have our tools and our measurements, it's time to start pattern drafting! I mentioned in my last post that I won't be going through the exact details of how to make a pants pattern, but I'm sure you're still curious to see what a pattern looks like!
Much like making software, building a beautiful piece of clothing is a whole lot harder if you try to make it perfectly the first time, details and all. The best thing to do is to build some basic scaffolding (or find scaffolding - yay open source!) and then build up from there, creating a nice series of test cases along the way. You'll end up with a more robust piece of software/apparel, even if it feels like you're going slower at the beginning.
In apparel, the scaffold is called a block. It's really basic - no pockets, waistbands, or other design details. Its primary use is for figuring out general fit issues, resulting in a basic canvas on which variations can be added later.
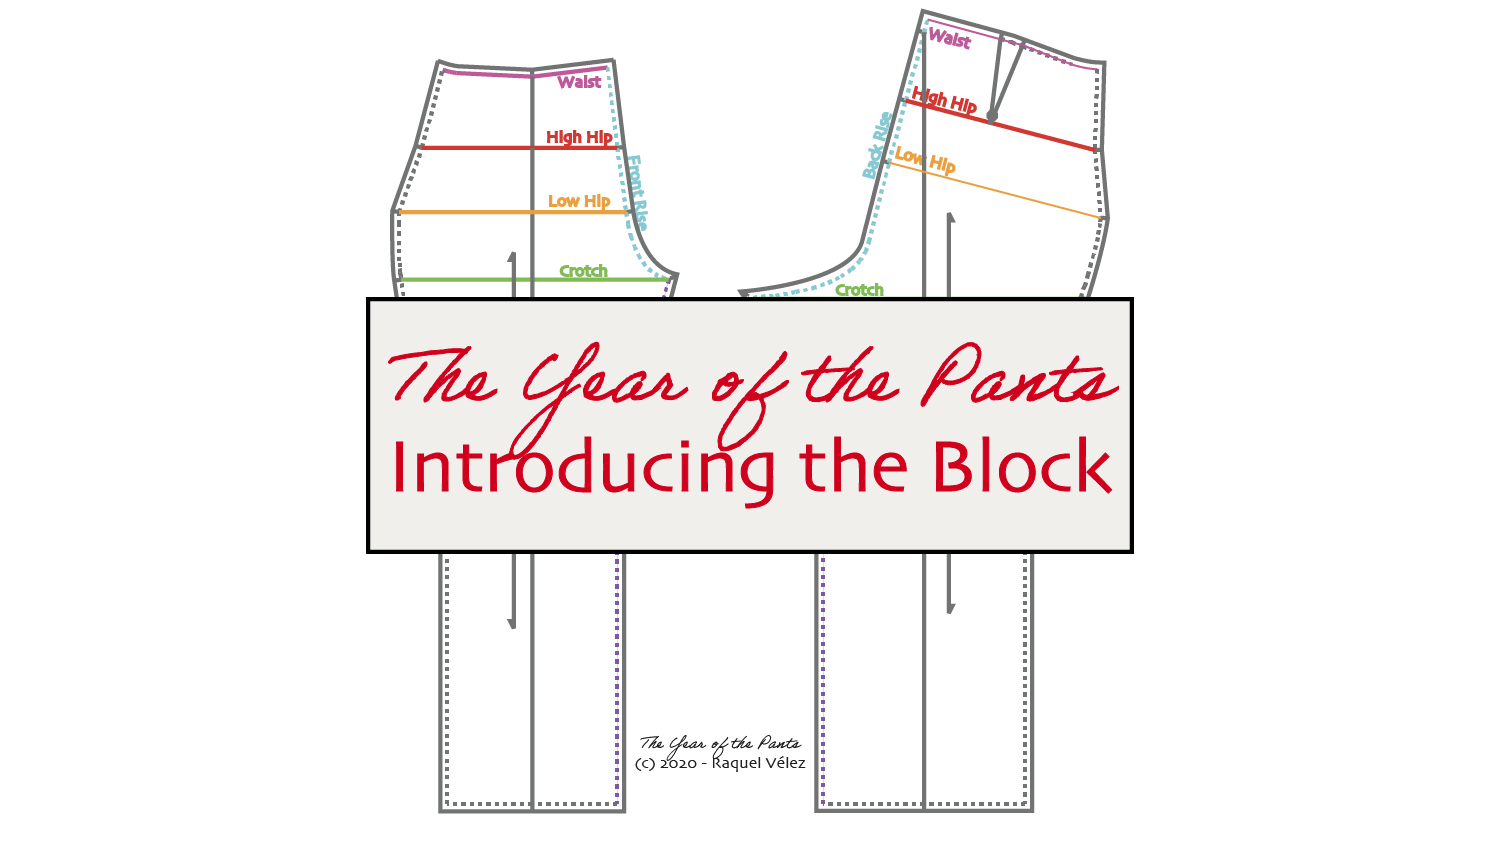
This is what a block looks like:
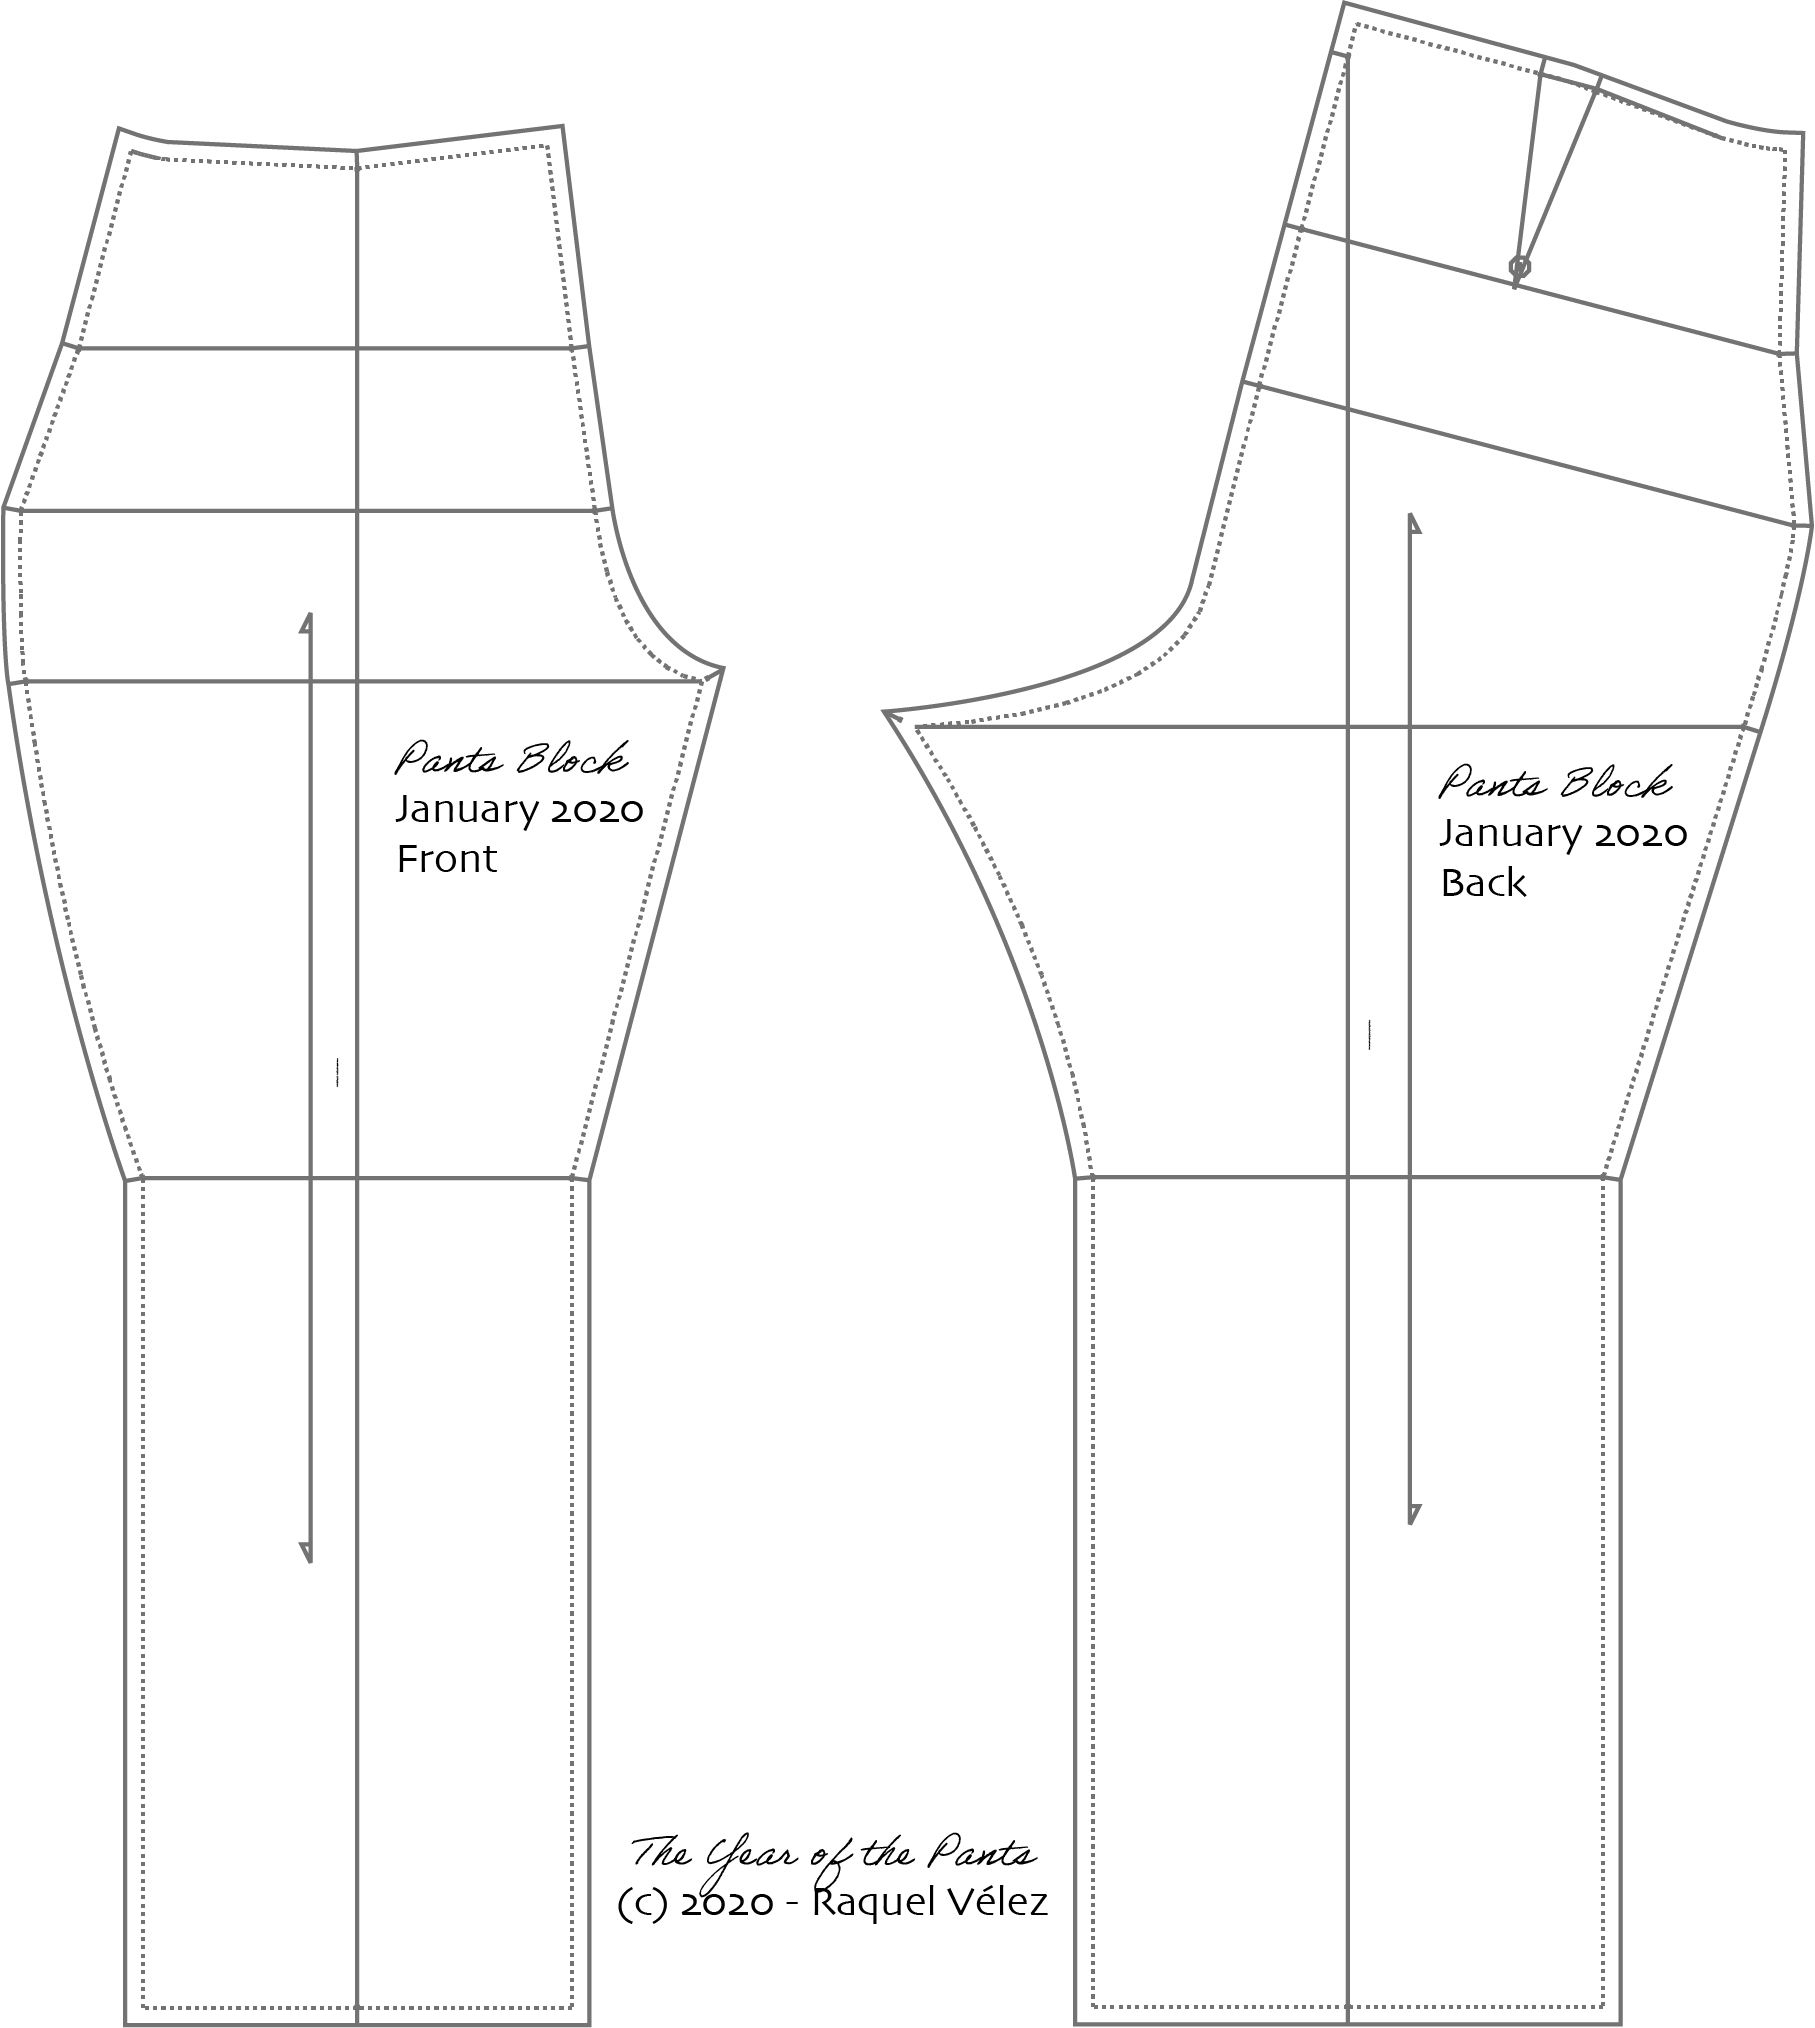
Notice that there is a front and a back, and that each piece is created in a way that it only accounts for 1/4 of the body. This is because humans are kind of symmetrical left to right, but not front to back. (In fact, very few humans - if any - are symmetrical in any way at all, but they're more symmetrical left to right than front to back.)
Let's dig into some more details about this pattern. Remember those measurements? Good news! They were useful, as shown here:
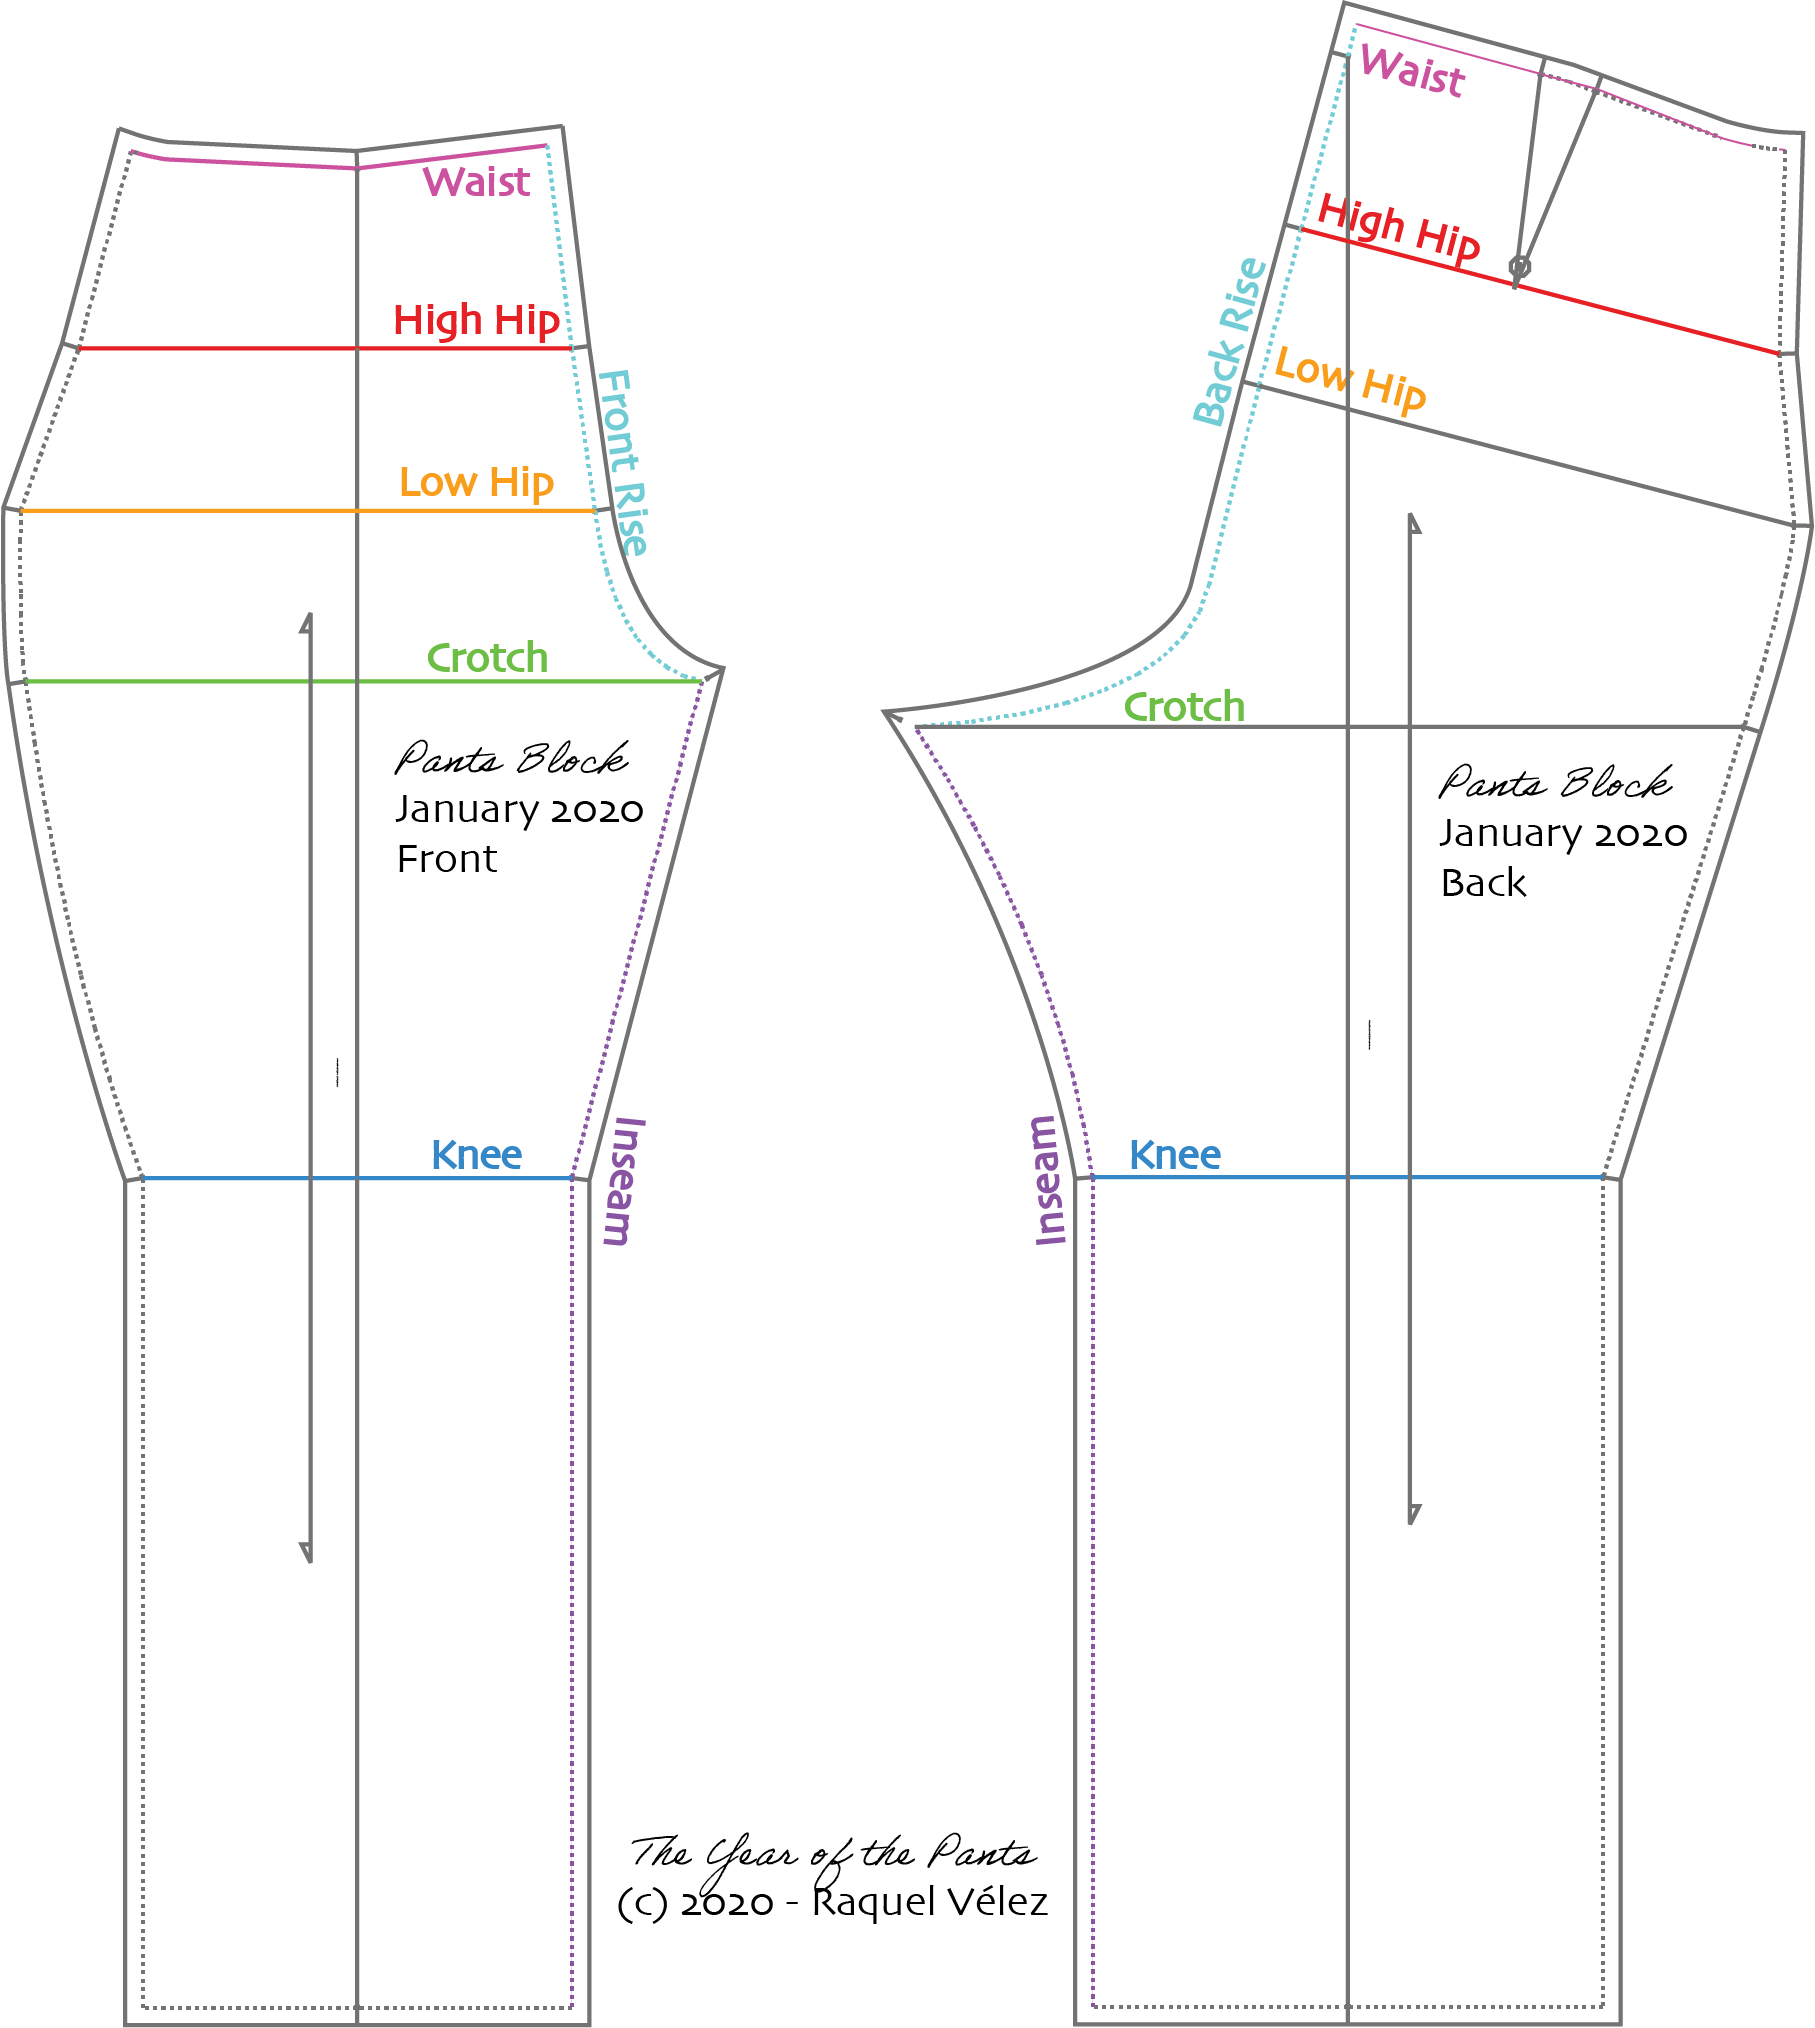
Keep in mind that if your low hip measures 47", you'll want to roughly divide it by 4 to get the right measurement for each piece of the block (please refer to your favorite patternmaking tutorial for specifics).
Note that the Total Rise = Front Rise + Back Rise. This is also often referred to as the Crotch Curve. The Inseam goes from the bottom of the pant up to the crotch point (as indicated by the horizontal Crotch line).
There are some other parts of the block that you might not be familiar with as well:
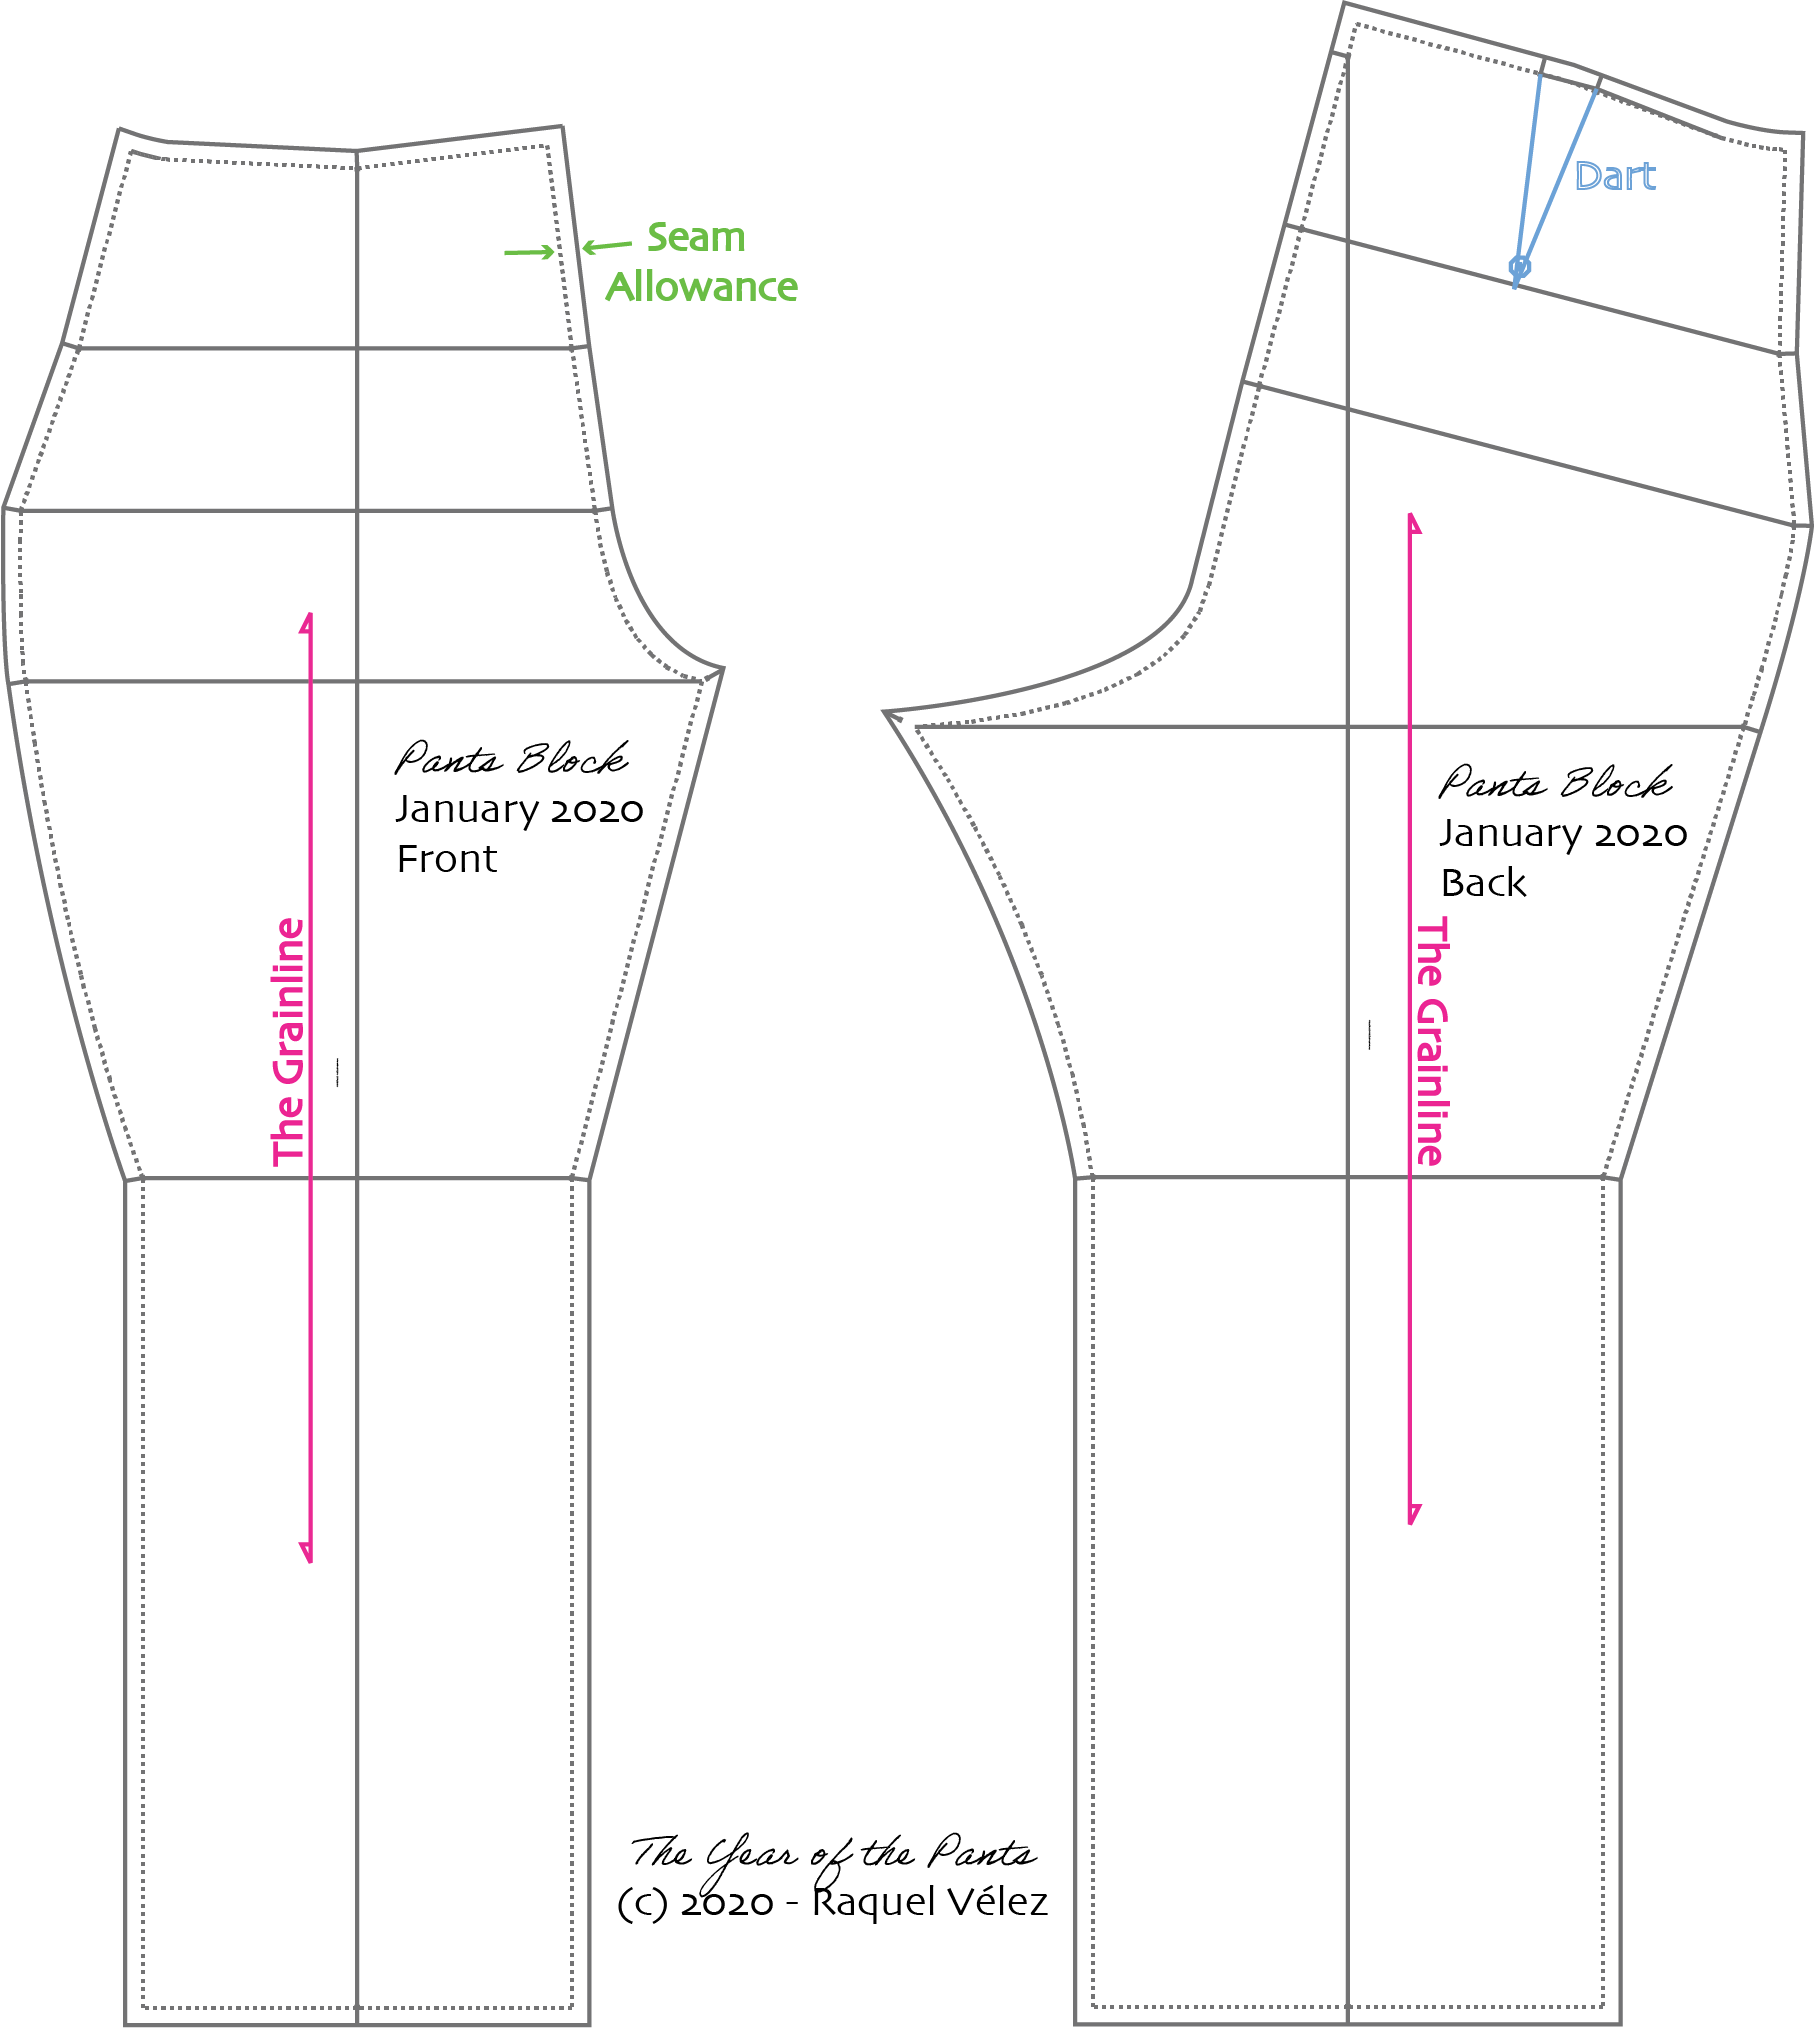
The Grainline follows the length of the leg, perpendicular to the floor. It's used to help folks know how to align the pattern onto their fabric. Fabric (I'll get to fabric in another post) usually also has a grainline, and it's important to make sure that the pattern and the fabric match up. When clothes are on-grain, they fall nicely; when they're off-grain, they look strangely off. (Have you ever had a shirt that kind of swings to the side? Or maybe jeans that wrap around your leg uncomfortably? That's often because the grainline of the fabric wasn't in line with the grainline of the pattern.)
A Dart is what helps create 3-dimensionality in a 2-dimensional pattern. It takes up some excess fabric up to a point, creating a rounded surface. (Try wrapping a rock with a piece of paper; you'll see that you're inherently creating darts to cover the round surface with the flat sheet). In the case of pants, darts help create space for butts 😉 There are ways to avoid darts, but it involves more pattern pieces that result in design details. Since this is just the block, we only need the dart for now.
The Seam Allowance is the amount of fabric available to anchor your stitching when sewing the pattern together: when cutting the fabric, it's cut along the solid line (aka the Cutting Line), and then sewn along the dotted line (aka the Stitching Line). If you look at clothes you bought at a store, you'll see that seam allowance on the inside of your clothes. The amount of seam allowance is left as an exercise to the designer, but it's helpful to know that home sewing patterns are often 5/8", while in industry it's often 1/4"-3/8". The larger seam allowance in home sewing patterns is so that there's a bit of wiggle room when fitting the pattern to the body. In industry, they don't bother with wiggle room, so it's unnecessary (and actually, it's easier to sew when the seam allowances are smaller).
You've probably noticed that these pattern pieces are digital and not drafted by hand as I might have implied in my tools post. Fret not! I have hand-drafted versions as well:
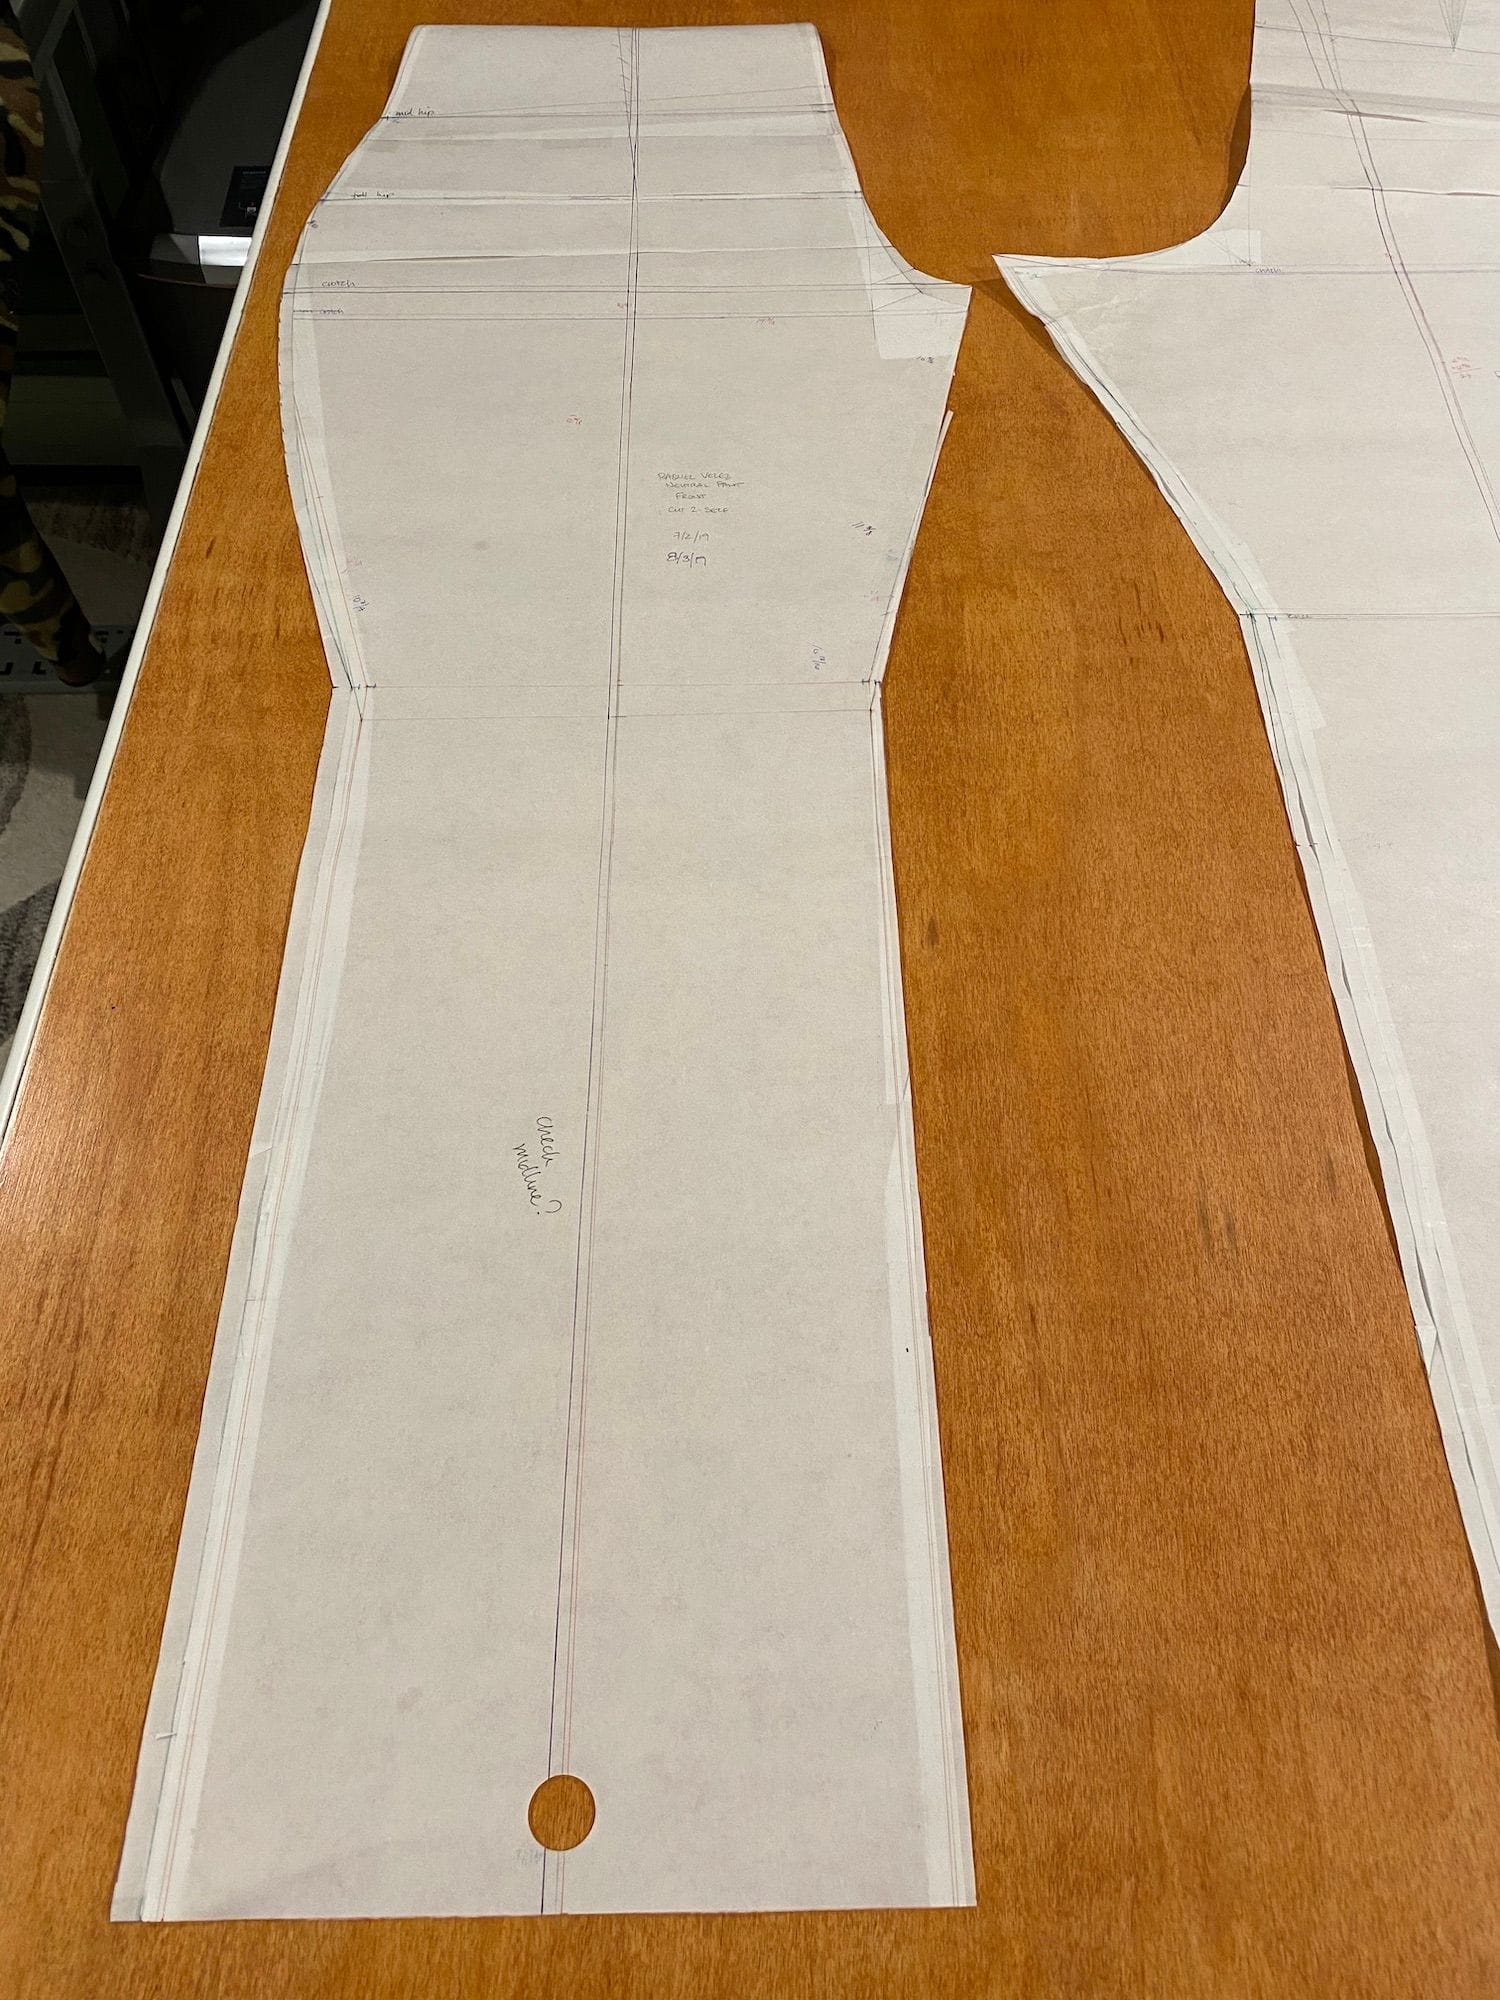
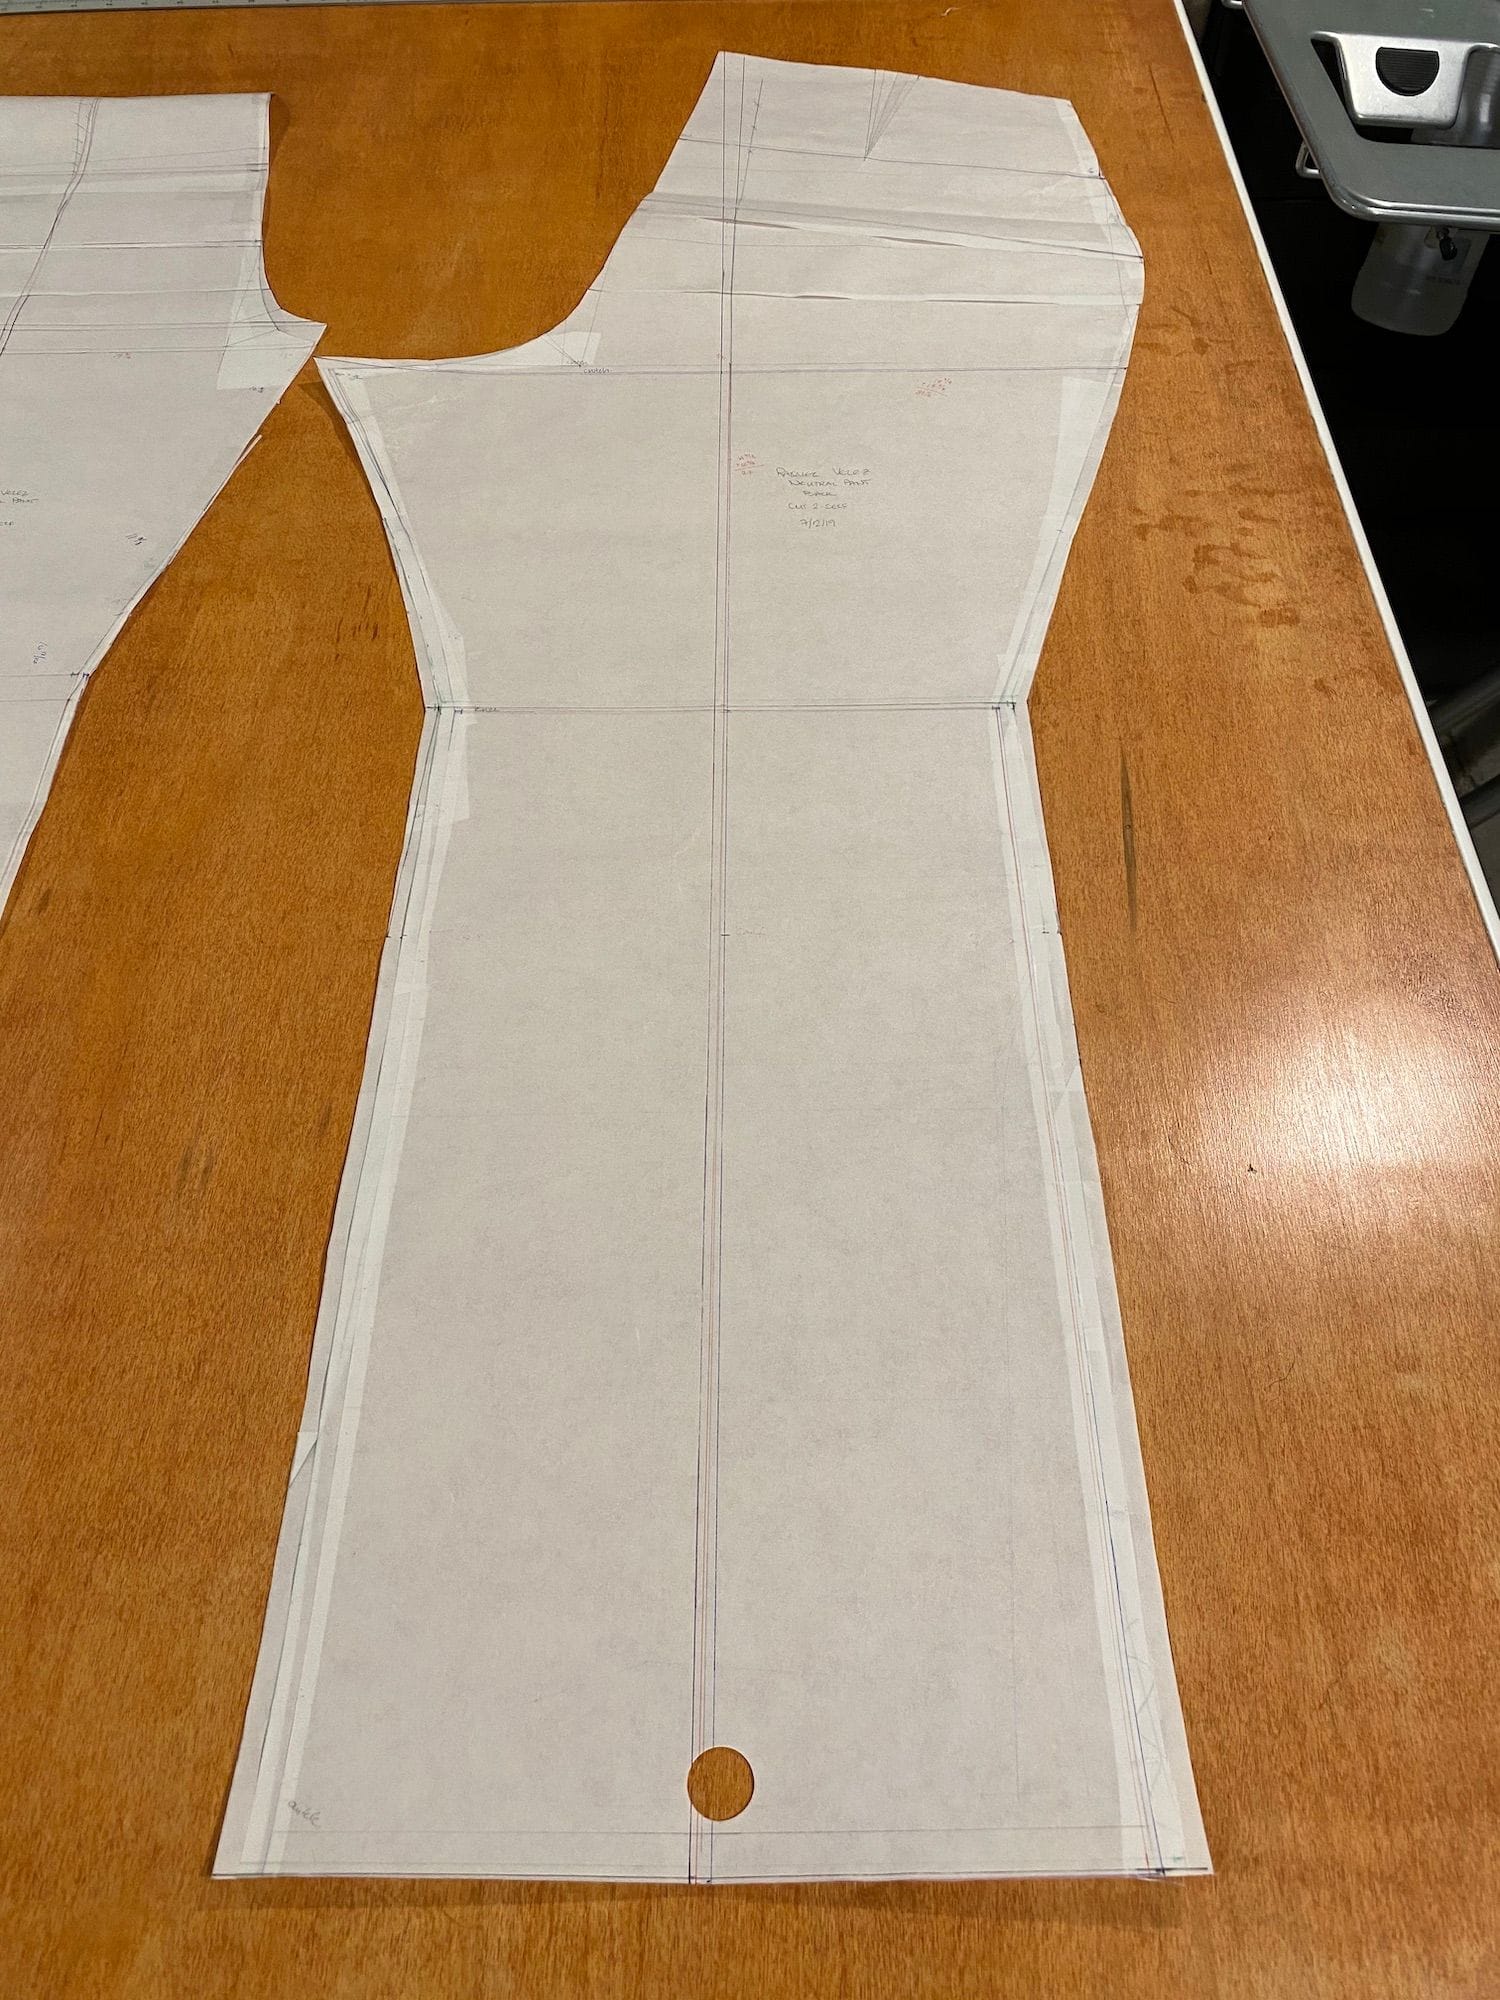
Front and back neutral fit blocks, drafted by hand
If you're keen on a closeup, you can see my terrible attempt at version control (plus a couple of different versions) in the following images:
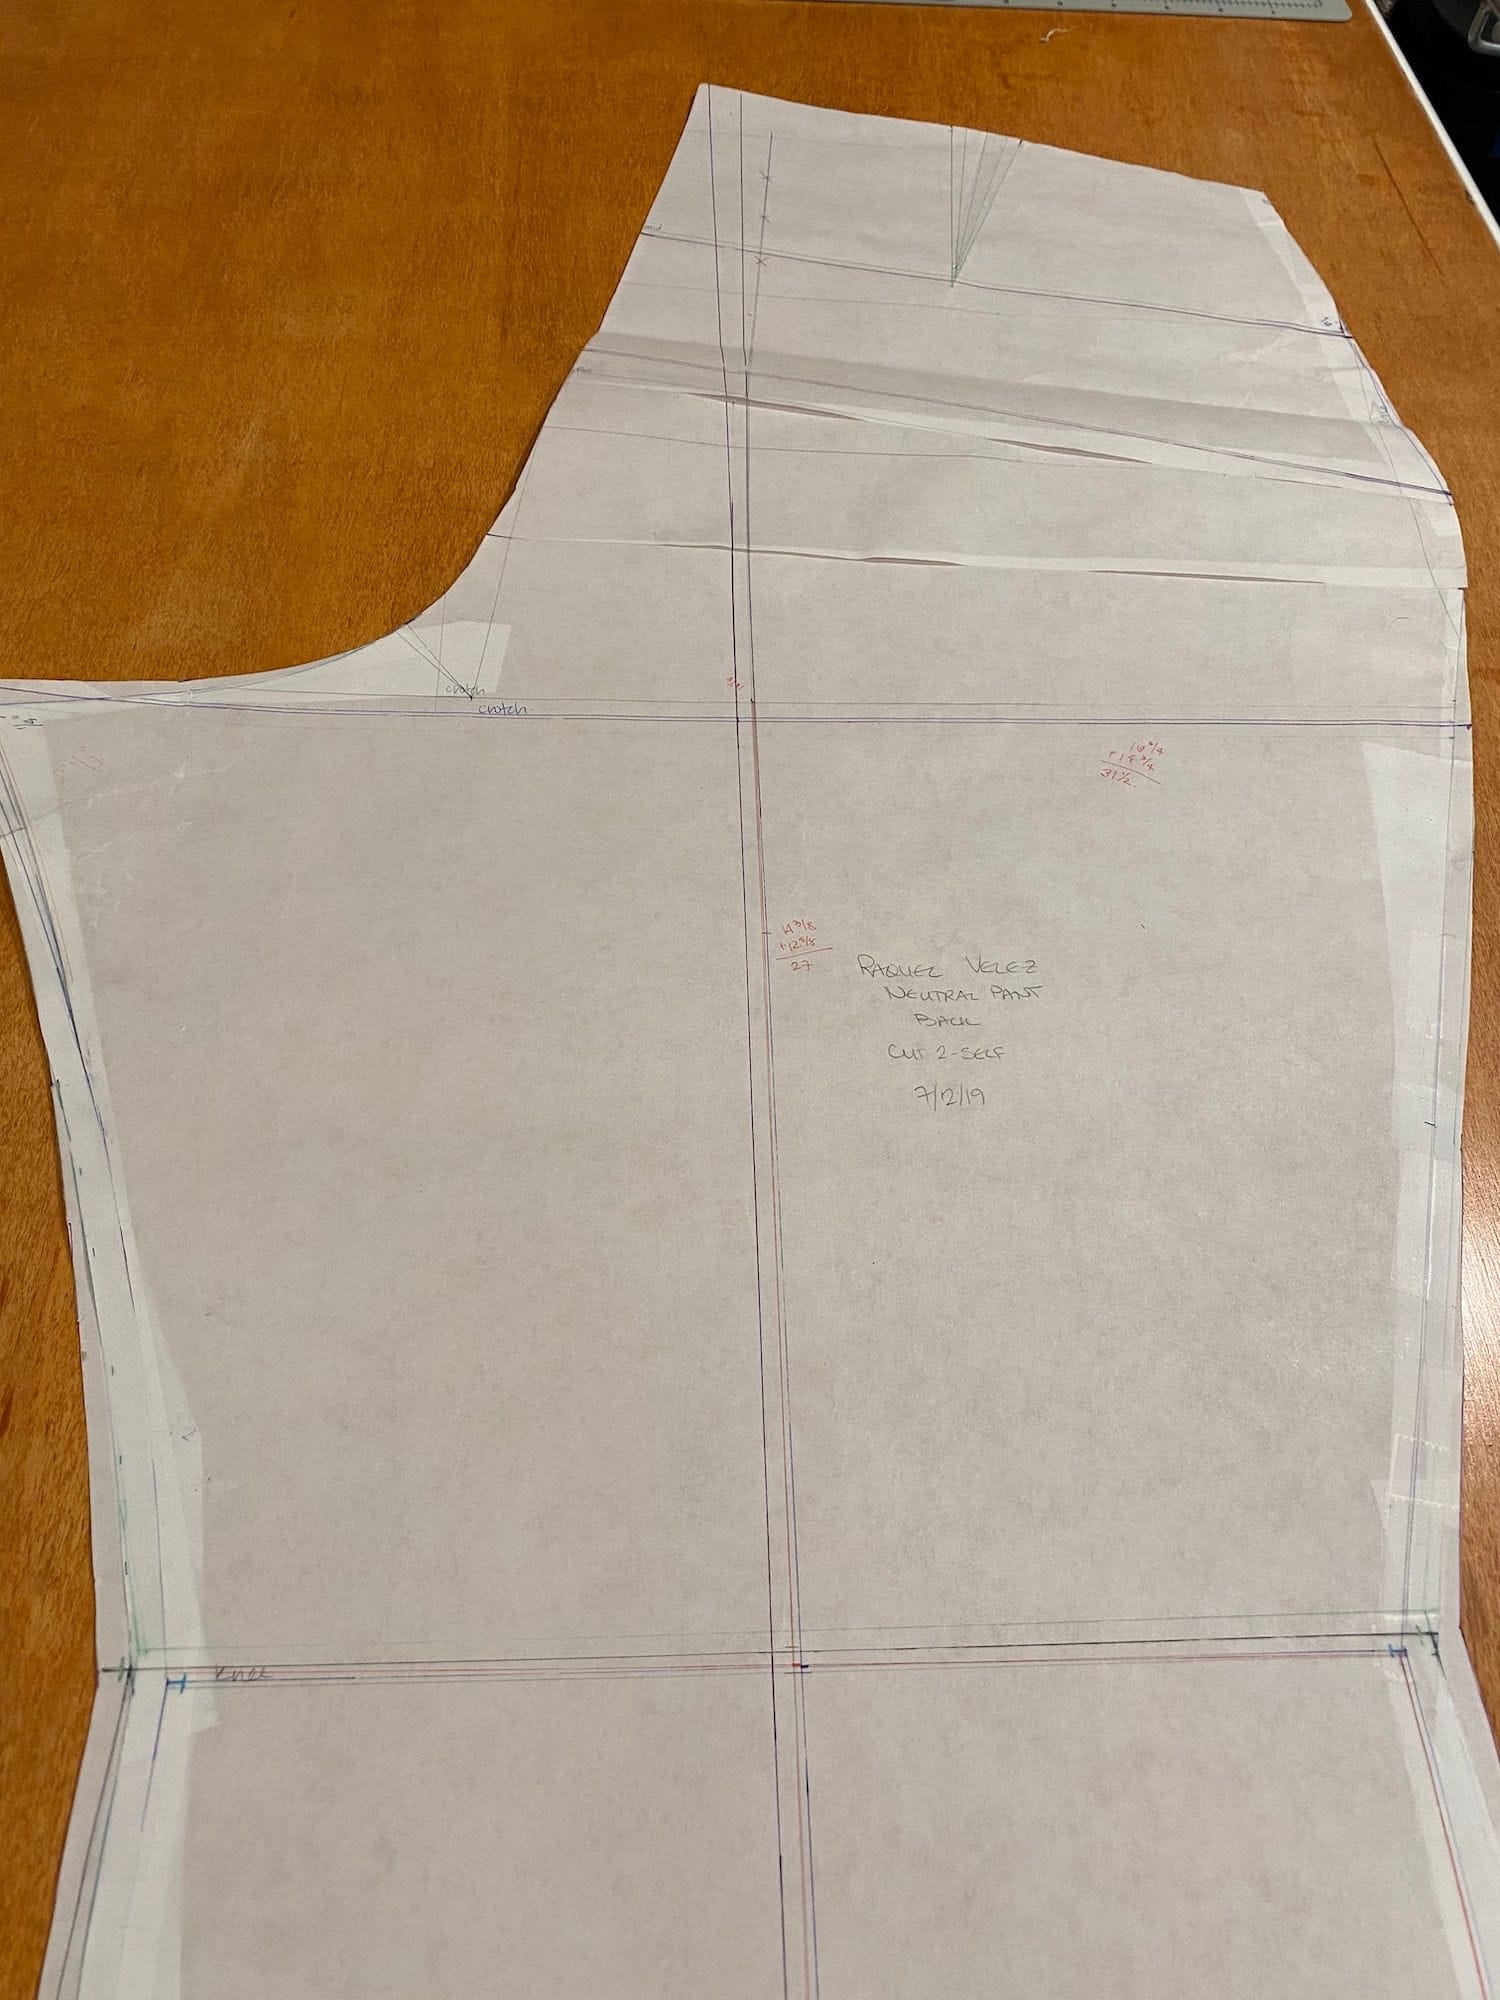
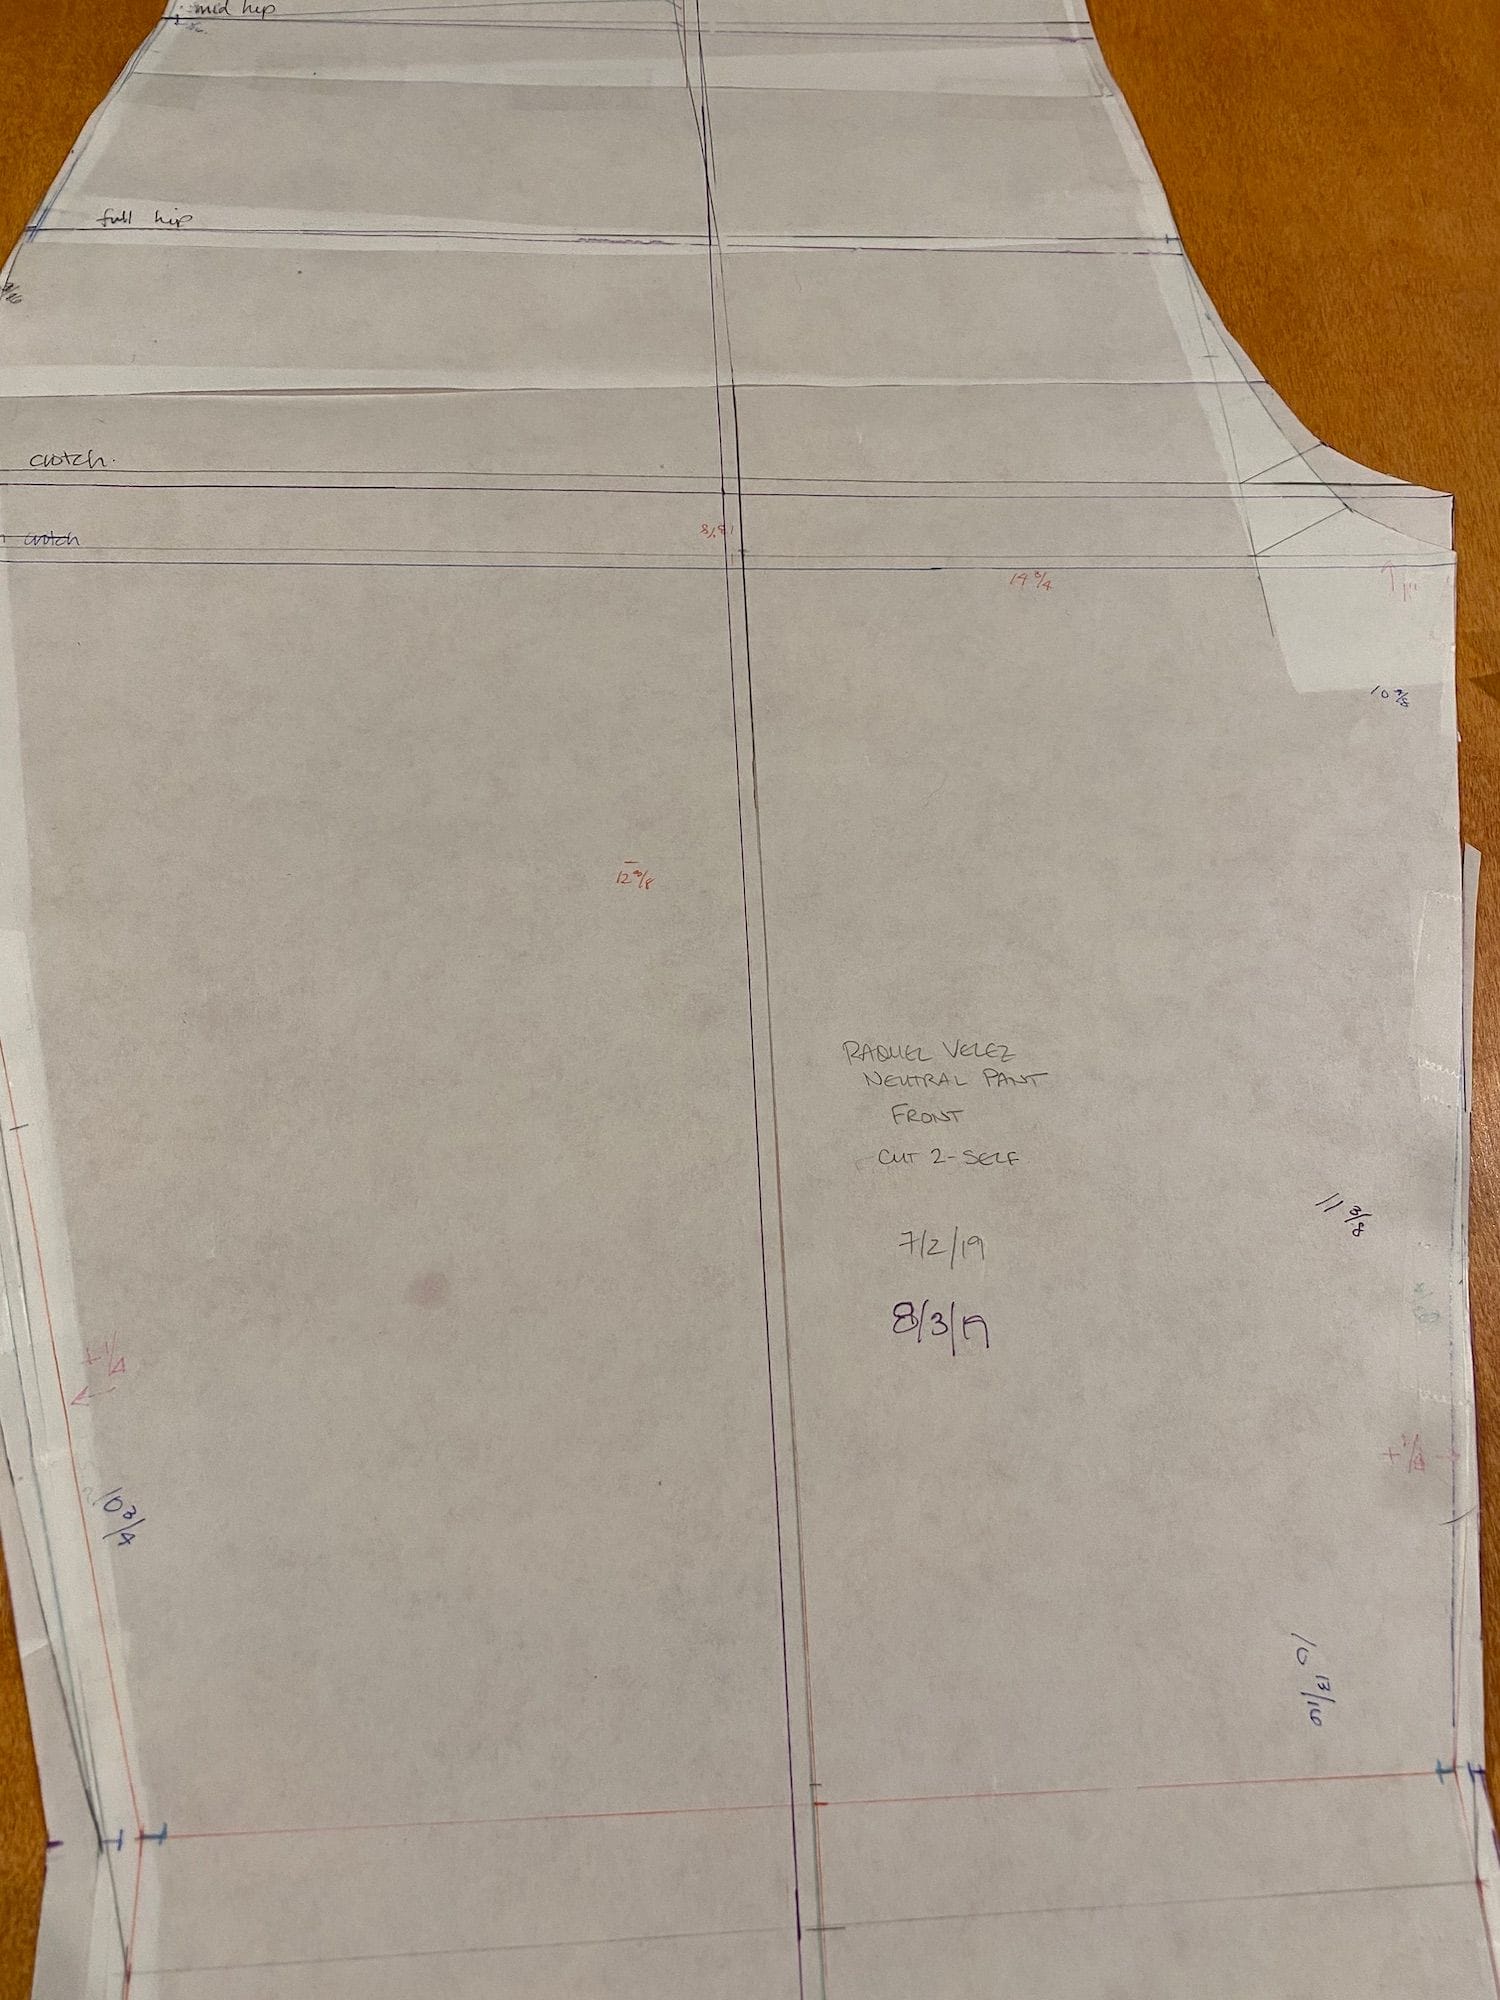
Closeups of front and back neutral pant blocks, drafted by hand
After spending several years drafting homework assignments, however, I decided to move my operations to apparel-specific CAD (computer-aided design) software on my computer. The results are the same, but making adjustments, adding seam allowances, and printing it all out can now happen with a few clicks of a button, as opposed to several hours of cutting and taping and tracing. 😛
What do you think? Is there anything I'm missing or that I can help clarify? Ask away in the comments or on social media!